

With its long wings and slim fuselage, the Wellesley is a distinctive aircraft to start. Add a whole new nose to it, and you’ve really got something unique!
The Vickers Wellesley bomber is an important plane. It brought the concept of the bomber from that of a lumbering biplane into the age of the monoplane, and had a number of advanced (for the time) features like retractable landing gear, enclosed cockpits and geodetic construction. Whereas many other bombers of its time were draggy, clunky affairs, the long wings and careful streamlining of the Wellesley gave it unmatched range performance and relatively good speed.
Despite these breakthroughs, the Wellesley was clearly a transitional type. It did not have an internal bomb bay; instead, its weapons were carried in two streamlined and enclosed paniers under the wings. This unusual configuration served to keep the weight of the plane down, and the structure simple. However, there were limitations to the size and weight of the bombs that could be carried and, as WWII showed, light bomb loads and small bombs just weren’t the answer for modern warfare. Thus, the Wellesley was not really suitable for combat in the European theatre of war, where modern fighters and heavier bombers were the norm. They were useful in Africa, though, and many served with distinction against the Italians there, serving until the early 1940’s against all odds.
Even though the Wellesley was not the household word that “Lancaster” and “Halifax” were during WW II, it was an important enough plane that Matchbox kitted it in 1/72. There must be some kind of mini-revival going on, too, since Sword recently announced the arrival of their version of the Wellesley. As for the Matchbox, it could be built either as a standard Mk.I, or as one used by the Long Range Development Unit (LRDU) for pioneering work on how to conduct long range bombing. For more in-depth coverage of the kit, it’s best to look at the Out of Box review.
Not Weird Enough:
With its long wings, thin fuselage and oddly-shaped engine installation, you’d be forgiven for thinking that either of the standard Wellesley versions would be weird enough to satisfy my desire for odd plane kits. However, just like any drug, I keep needing to find weirder and weirder stuff to build. So began my search for interesting variants of the Wellesley. It was surprisingly difficult, since there wasn’t much done with these aircraft beyond the Mk.I standard. However, I did find two different versions; one for testing fuel dumping, with a weird extra cockpit, and one for engine testing, with an extended nose.
It was the latter that really caught my attention. Sometime around 1937, A Wellesley was used to help test the Bristol Hercules HE1S radial engine. The machine used was renamed as a Vickers Type 289, but was more or less a standard Wellesley; with the exception of the nose. Normally, a Wellesley has a 9-cylinder, one-row radial engine. However, the Hercules is a two-row, 14-cylinder motor. This is a much larger and more powerful engine, and it necessitated a completely new nose on the aircraft. The cowling was of the NACA type used on the LRDU aircraft, but with an extra section between the cowl flaps and the firewall. The extra length and mass really made the Wellesley look mean and more modern, kind of like the illegitimate love-child of a U-2 and a Skyraider! There was only one photo I could find of this bird, and only one colour profile on Wings Palette, so I didn’t have much to go on!

You want nose? I’ll give ya nose! This is the extended nose on Type 289 Engine Testbed aircraft.
The Nose Knows!
I have recently started getting more into British bombers and other oddball interwar aircraft, but I don’t have a lot of spare parts for them yet. Thus, I did not have a spare Hercules lying around for my project. Never daunted, I pulled out the spares box and started rummaging around. I found two BMW 801 14-cylinder engines from my old Ju-88 G1/G6, and these looked just about perfect. Sure, they’re not quite right, but both the Hercules and the 801 are large engines and have the right number of cylinders, so it seemed good enough for me!

The brown is the original engine, the grey-white is AMT’s BMW 801. The original motor looks so weak…
Now, I needed a cowl extension. The LRDU main cowl would work for the front end, but the extension between the firewall and the back of the engine was needed. The Ju-88 cowls were too small and detailed for the purpose, though. Then I remembered a friend of mine from my local IPMS club had (rather dejectedly) given me a NOVO Sea Fury. He was dejected because it was so terrible it couldn’t really be built. I have the Frog, and in comparing the two, his reasons for dejection became clear. The NOVO is utter trash. However, you know what they say about “one man’s junk”!
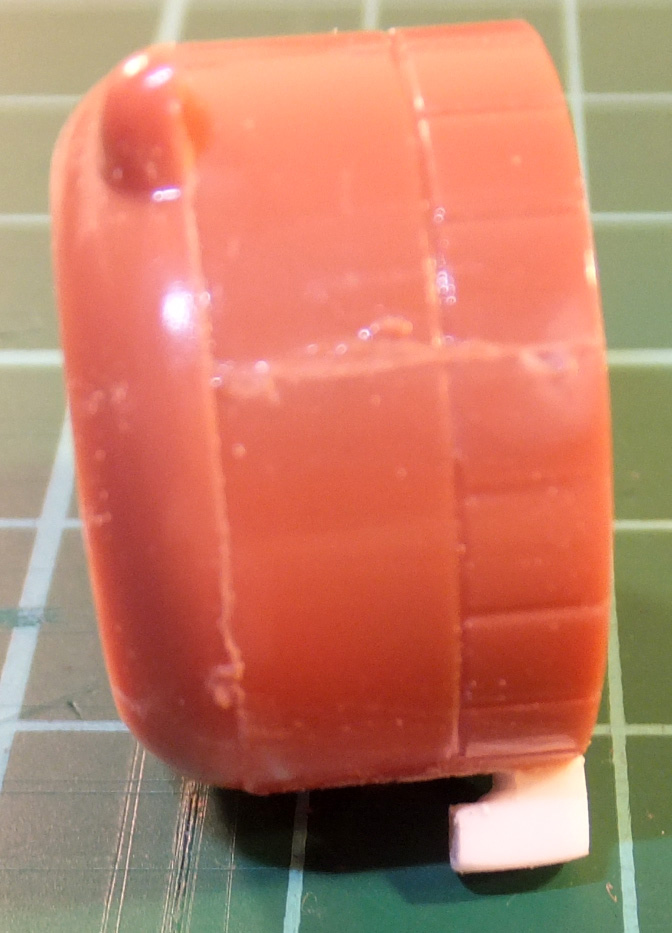
As it turns out, the cowling on the Sea Fury was perfect for what I needed. Of course, I needed a featureless tube, so a lack of detail was actually a plus! I cut the cowling down and put a lead on it so that the Wellesley’s real cowling would fit over it nicely. I did some sanding and trimming and Voila! I glued some sheet styrene over the end of the cowling to act as a firewall, and mounted the kit’s spinner retainer as a locator for the engine. In comparing the 801 to the kit’s original engine, I noticed that it was a bit smaller in diameter, but that was fine; it meant it would fit into the cowling after the kit was done, minimizing the need for complex masking!

Here’s the cut down cowl with the new firewall glued in place. This was before I sanded the lead onto the firewall; also, the locating stub isn’t mounted yet.
I glued the new extension to the body, and found that there was another difference between this plane and a standard Wellesley; the contour that goes from in front of the cockpit was longer on the 289, and extended over the new nose plug. To build this up properly I used some Apoxie Sculp and sanded it to the right shape. Another distinct feature of the Hercules test aircraft was the air scoop on top of the engine. There were no good shows to show if it was square or round cross section, so I assumed square, and made one out of sheet styrene. I glued two pieces together, cut a hole in the cowling and then shaped the result with razor saws and sanding films. The end result was pretty much spot-on with what little information I could find.

Here’s the new cowl chunk on a taped-together body for a test fit. Overall, it went on there really nicely!
Here’s the intake on the top of the cowl all finished off. It’s on the bottom of the photo because that’s the only way I could get it to stay while taking a picture. I could have rotated the picture, but that seems like cheating.
There’s also a small (oil cooler?) scoop under the engine. Again, there’s no real information on the shape of it, so I assumed it was a round tube, like I’d seen on some other aircraft. I made the “pylon” for it out of sheet styrene, but the tube eluded me. Eventually, I found an old Gundam rifle that I wasn’t using, and cut a chunk out of the barrel. It was already drilled through, and quite round, so it worked perfectly!

This is the finished cowling minus the oil cooler. You can see the new intake on the top, the new colwing section, the Apoxie Sculp nose contour extension and the oil cooler pylon all to good effect.

Here you can see the oil cooler bit glued onto the new pylon I made for it. You can also see the Gundam rifle below it. The things that come in handy, eh?
There was a problem with the BMW 801, though. For some reason, AMT had the engine halves keyed such that both banks of cylinders lined up, which is ridiculous for a two-row radial. It was a simple enough matter to fix it, but I can’t begin to understand what they were thinking. As if to put the cherry on the proverbial sundae, I found that the Matchbox propeller fit perfectly into the 801 without any adjustment at all! Can you say providence? I thought you could!
The Rest of the Build:
Early on, before doing the “nose job”, I found (to my expected disappointment) that the cockpit detail (such as it is) on the kit wasn’t really a great fit. The seat was going to prove to be difficult to install after the plane was done, and there was no real floor in the cockpit. To change this, I put in my own floor that not only went under the seat, but curved up in front of it too, to create a “foot well”. No one would see this, likely, but it’s one of those things that was likely to show if it wasn’t there. I used some thin sheet styrene and bent it into the right shape. I glued it in and tested that I could indeed glue the seat to it once everything was together. It worked, and helped to fill in the cockpit at least a bit.
Thankfully, the bulk of the rest of the build was utterly conventional. There aren’t any other apparent differences between the normal Mk.I and the Vickers 289, so I build the kit up as per the instructions. Most parts of this kit are in halves, and there’s not a lot to the build. The fit was amazingly good, especially for a Matchbox! The only place there was an issue was beside the step at the back of the wing on the port side. This little piece didn’t match up AT ALL! I used a shim of styrene plate to make up the difference and close the gap.

So, it doesn’t QUITE match up at the wing step. A bit of sheet styrene will help with that!
Another place that needed some help was the underside of the wings. There are holes already drilled for the bomb paniers, although this trials aircraft didn’t use them. To plug the holes, I drilled them out and filled them with styrene rod. I didn’t sand them in perfectly, since it would risk destroying the fairly subtle fabric texture on the wings. However, I figured that on the real plane, there would just be caps on the adapter holes, so this worked out fine.
The biggest problem, fit-wise, was the rear cockpit. Firstly, there’s a cut out for the defensive rear machine gun, and I filled that with Apoxie Sculp as well as filling in a bit of the rear bulge, to make things a bit stronger back there. However, the rear canopy is designed to be openable; this means that the canopy has small hinge pins that fit into holes. This, in itself, is not a big deal. However, because it has to move, the canopy doesn’t match up to the sides of the canopy rails, but rather sits inside them! Thus, when I chopped off the hinge pins, there was nothing to hold the canopy in place! To rectify this, I used small pieces of styrene to build a collar for the canopy. I used four pieces to essentially form a “ledge” to which I could glue the canopy when all was said and done.

Here you can see the “collar” I had to build around the inside of the rear cockpit opening; without this, the canopy just falls into the fuselage!
Paint and Decals:
The paint on the 289 looked, it seemed, to be the standard Dark Earth and Dark Green of a typical RAF bomber from the mid-‘30s to the mid-‘40s. However, because this plane was used for trials purposes, the underside was yellow! Now THAT’S cool! Not only does a cammo plane with a yellow underside look freakin’ sweet, it also matches my Trimotor! In fact, I assumed that the cammo pattern was close to the standard layout used on large aircraft, like the Trimotor.

This nose shot gives a good look at both the “Hercules” engine and the yellow underside. Gotta love yellow bellies on cammoed planes!
I painted the yellow first, using Polly Scale Reefer Yellow. I know this is a train colour, but it looked perfect for the job, so I used it. It took a lot of coats to cover the grey Colourplace primer I used. Once the yellow was on, I masked along a fuselage stringer line and covered the lower wings with paper and Tamiya tape. I didn’t have a colour that looked right for the Dark Earth. I find the Model Master Acrylic “RAF Dark Earth” to be too brown; it needs a bit more red in it. Of course, depending on the art or picture you look at, “dark earth” is a very variable colour. I figured that meant I had some leeway in the final colour, so I mixed up a colour to do the job. I used Model Master Acrylic Dark Green for the (duh) dark green.
Normally, I consider RAF planes to have hard-edged cammo. However, I wanted to practice my airbrushing, so I decided to do the Wellesley’s paint unmasked and freehand. This was a lot more difficult than I thought, and I got a lot of overspray. The MMA colours are a bit thick, and tend to spatter. This is no problem when masking is used, but for freehand work, it’s annoying. I did find that the MMAs can be thinned a bit more than I thought they could, and after a few rounds of touching up, I got a scheme with which I am quite pleased. The colour definition is good, but not as sharp as on a masked line, which is exactly what I wanted!

Here you can see the typical inter- and early war RAF cammo pattern and “Peacetime” roundels.
The decals that come with the Wellesley aren’t bad. They’re Revell Germany, so they’re thick and matte, and tend to silver a lot. Most of the decals given, though, would be useable. The only things I didn’t have were the call numbers. The sole Type 289 had the registration K7772; this was on the rudder, rear fuselage and in great big characters under the wings. Clearly, I would have to make these myself. Thankfully, this was no problem with MS Word and Testors Ink Jet Decal Kit.
I Futured and lightly sanded the model before re-Futuring and applying the decals. The homemade ones went on beautifully, even over the expansive lower wings and their fabric contours. The kit decals, as expected, were more troublesome. The large amount of film on the “shoe print” walkway decal on top of the wings proved to be a major source of problems. Even applying Future to the top and bottom of the decal didn’t completely cure the silvering. Also, the kit decals were not that keen on conforming to the surface of the plane. I used Future to soften them, and it worked, but it took longer than normal.

Here you can see the large, homemade call numbers under the wings. Talk about high-viz!
One potential point of contention on the decal scheme could be the overwing roundels. By the time that the war was on, the RAF replaced the yellow-ringed roundels with the more familiar blue/red circle. However, since this plane was used for trials work beginning in 1937, I assumed that it would still be wearing its original “peacetime” roundels. Since I couldn’t find any pics of K7772 showing the upper wings, I’ll just go with this assumption; until someone can prove me wrong, I’ll just say I’m right!

From this angle, you can see the custom-made “K7772” decals on both the rudder and the rear fuselage. Are the overwing roundels correct? No idea. Do they seem feasible? Well, this testbed flew in 1937, so yeah, it does.
Final Steps:
The landing gear are typically simple, Matchbox affairs. There are a couple of legs and oleos, but that’s all. There’s no detail in the too-shallow wheel bays at all, nor on the gear doors. I painted the gear and bays with MMA Steel and gave it a light black and brown wash using Citadel washes. I flatted the tires and rotated them onto the wheel posts so they sat appropriately. Attaching the gear is a very haphazard undertaking; there’s really nothing to tell you things are in the right place, and nothing fits quite right. There was a lot of aligning and realigning that went on in this stage. Sadly, while drying, one of the gears sagged forward, meaning I had to break it all apart and reset it (like a broken limb). It worked, but could have been a disaster.
Normally, to improve the visual impact of a kit, I outline it in pencil and then pastel over the lines to post-shade them and make them “pop”. However, this can be a very stark effect, and I wanted to try something a bit more subtle. I used the pencil only on lines that would be cracks; the rudder and wing control surfaces and cowl flap lines being the examples here. I then pastelled over them. I used straight pastels and a cut down Testors #0 brush to apply pastels to other junctions and bulges, as well as the lines in the top of the wings. I tried to make the pastels closer to the paint colour, too, so that the contrast wouldn’t be jarring.
Overall, this approach worked, I think, although it’s still a bit more pronounced than I thought it would be. Not pencilling in the lines in the wing and on the fuselage underside did prove to be a good idea, though, and I’ll continue it in the future. I decided to eschew trying to accentuate the fabric sag on the body and wings. It could be done with a light wash, perhaps, or some highlighting, but the folks at Matchbox did such a good job that light naturally seems to fall where it should and the pattern basically highlights itself, just like in real life.

This picture shows how Matchbox’s “fabric” effect works without highlighting. There’s no need to pick out the high- or lowlights on the pseudo fabric covering the fuselage and wings; natural light gives just the right effect!
Once all the decals and pastels were down and set with Future, I used Delta Ceramcoat Matte Interior/Exterior varnish to dull the finish. However, dead-flat isn’t quite right for most things, and I applied a Future-augmented version of the varnish to bring the finish up to a satin sheen. With both Future and the Varnish in there, the final coat is very tough, once dry. Of course, it takes days to dry fully, but you can handle the plane once it’s sat for about 10 hours.
Installing the engine was easy, as it just dropped onto the mounting post I’d glued in there earlier. I painted the inside of the engine bay RAF Interior Green, and gave it a black and brown wash, just like the interior of the plane. The cockpits fit on surprisingly well, and the collar I made for the rear canopy really saved the day.

Another look at the “Hercules” engine; the fit of the 801 in the Wellesley’s cowl was a stroke of luck that one can only wish for!
Conclusion:
The Matchbox Wellesley is a fairly simple kit and most people should be able to enjoy it without problem. My experience was a bit more vexing, but that’s entirely my own fault! To say that the model is “austere” would be accurate, and perhaps Sword’s offering of the Wellesley will have more detail both inside and out. For superdetailers, there’s a lot of room to go wild on this kit, although to be honest, not many will see what’s inside anyway.
I really enjoyed this kit and it seemed to fit better than other Matchboxes I’ve built. Its’ a sturdy kit, too, once the gear are dry, and its long wings make it an impressive display piece. Sure, it’s not a Tamigawa superkit, but it’s a nicely detailed model that anyone can build.
If you’re a fan of the oddball, the RAF or the interwar period, this is definitely a good one to get.

Here you can see just how big the Wellesleys’ wings are. This is the Wellesley compared to the Airfix Spitfire F.22. The whole Spit is only as big as one of the Wellesley’s wings!
Interesting Aside:
One thing that is interesting to note is that while the Wellesley may seem an anachronism now, it actually was a very, VERY prophetic aircraft in many ways. Here are a few thoughts to help you see the Wellesley in a new light:
1.) Today, we are moving away (largely) from the super-heavy bombers to single/twin-engined fighter bombers and lighter attack aircraft; the Wellesley has more in common with an F-16 or even a Tucano than it does a B-52!
2.) The current push is to develop smaller, lighter weapons to be carried in either larger numbers or in the same numbers on smaller planes. The US military’s SDB (small diameter bomb) is a perfect example, as is the new guided 2.75” aerial rocket, the APKWS (advanced precision kill weapons system). The Wellesley was damned by its small bomb load; it’s ironic we’re now actively trying to make bombs SMALLER, isn’t it?
3.) Last, but not least, consider the Wellesley’s unique bomb panier system. If you’ve seen the Super Hornet International Roadmap aircraft, you know that Boeing is developing an enclosed weapons pod to allow the Super Hornet to carry weapons externally, but stealthily. Now, the Wellesley wasn’t stealthy, but the modern reversion to enclosed external weapons pods is certainly an interesting move, eh?
